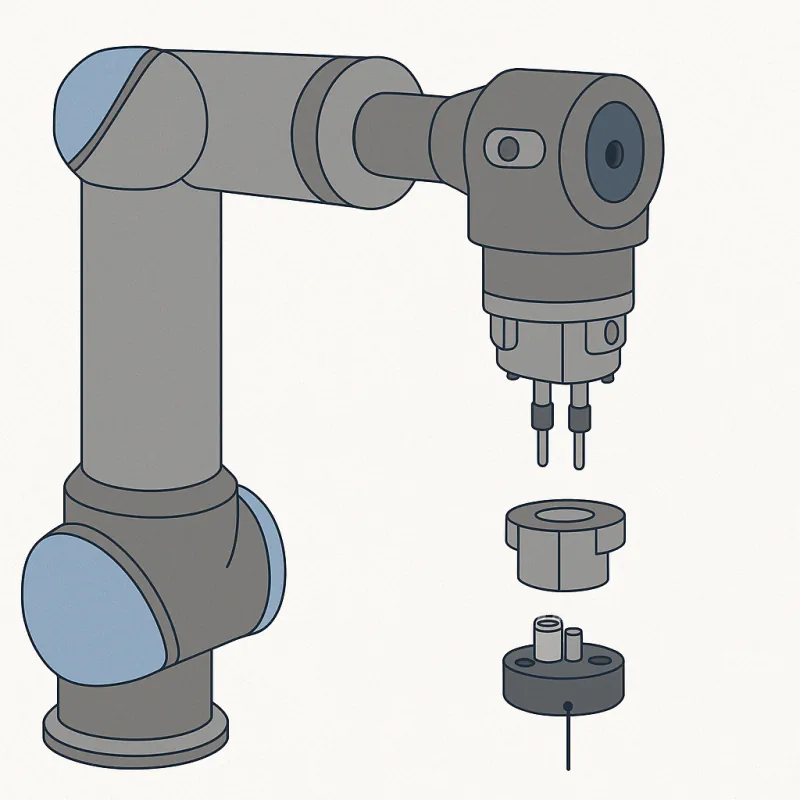
A cobot tool changer lets your collaborative robot switch between tools—like grippers, dispensers, or welders—without manual reconfiguration. It’s the backbone of modular, flexible automation, especially in high-mix or multi-process environments.
While tool changers are often associated with large industrial setups, they’re becoming essential for cobots too. In this guide, you’ll learn what a cobot tool changer is, what hardware is needed, and how to physically and programmatically set one up—step by step.
At Cobottools.com, we don’t sell tool changers—we equip you with the knowledge, CADs, and wiring diagrams to implement or adapt one yourself.
🧩 What Is a Cobot Tool Changer?
A tool changer consists of two parts:
- Robot-side interface (stays attached to the cobot arm)
- Tool-side adapter (stays with each tool you want to switch between)
These two sides connect and lock together—either manually or automatically—allowing your robot to perform multiple tasks with different tools.
🔧 What Hardware Do You Need?
To build or integrate a cobot tool changer, you’ll need:
- Mounting plates: Robot flange on one side, tool interface on the other
- Locking mechanism: Manual latch, twist-lock, or pneumatic coupler
- Electrical connectors: Pass-through I/O pins, signal pins, or plugs
- Optional media: Pneumatics or vacuum channels for air tools
- Dowels or guide pins: For alignment and repeatable accuracy
👉 We provide sample CADs and adapter templates at Cobottools.com to help you design your own.
🛠️ Mechanical Setup
- Mount plates using the standard ISO 9409-1 interface
Most cobots support this pattern (50 mm diameter with 4 M6 threads). - Add alignment pins
These ensure precision placement and prevent tool wobble. - Route cables and tubing
Avoid interference with moving parts. Use flexible cable sleeving where needed. - Secure the locking mechanism
Whether manual or automatic, make sure it is tight and free from play.
💻 Programming Your Tool Change
You’ll also need to teach the robot how and when to switch tools. This includes:
🔹 1. Define Tool Frames
Each tool needs its own coordinate system (TCP) in your cobot’s software.
🔹 2. Write the Change Logic
Your program should include steps like:
- Release tool A
- Move to docking station
- Attach tool B
- Confirm lock before continuing
🔹 3. Use I/Os or Sensors
For automatic changers, input signals verify whether the tool is properly attached.
🔹 4. Integrate With Your Robot Platform
- Universal Robots: Use URCaps or digital outputs
- FANUC, Doosan Robotics: Use teach pendant I/O setup
- Most systems allow safety checks, tool frame switching, and IO-mapped lock detection
🧠 Manual vs. Automatic: What’s Right for You?
| Feature | Manual Tool Changer | Automatic Tool Changer |
|---|---|---|
| Switching Time | ~10 seconds | 2–3 seconds |
| Setup Effort | Minimal | Moderate (needs I/O or pneumatics) |
| Best For | Prototyping, small batch | High-volume, multi-task setups |
👉 Even if you’re building your own system, you can start with a manual latch system and upgrade later.
🧪 Example Use Case
Let’s say you’re building a workstation that applies adhesive and also picks and places items:
- The cobot starts with a gripper
- Once trays are filled, it drops the gripper
- It picks up a glue nozzle and applies sealant
- A sensor confirms the nozzle is locked
- The robot continues sealing tasks
This can all be done with one robot, using smart programming and a well-aligned docking station.
🎓 Where Cobottools.com Comes In
We don’t sell hardware—but we give you the tools to succeed:
- ✅ CADs for ISO mounting and adapter plates
- ✅ Wiring and I/O sample diagrams
- ✅ Tool change logic templates
- ✅ Brand-neutral integration tutorials
Whether you’re using Yaskawa, ABB, or something custom-built, our guides help you integrate tool changers intelligently and safely.
✅ Conclusion
A cobot tool changer doesn’t have to be expensive or complicated. With the right hardware and a bit of smart programming, you can turn any cobot into a multi-tool machine—and maximize its ROI.
👉 Join now to access free CADs, tool changer tutorials, and wiring diagrams that help you build flexible, future-ready automation.


Leave a Reply